Floor 90 (Boss)
Heaven-on-High • Floors 81–90
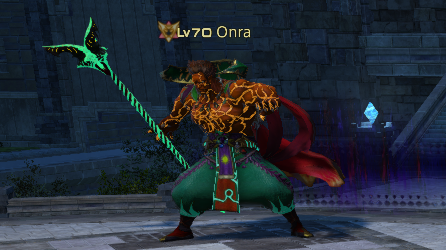
Boss: Onra
| Ability | Potency | Effect |
|---|---|---|
| Burning Rave |
|
telegraphed circle AoE |
| Knuckle Press |
|
telegraphed pointblank AoE; inflicts knockback |
| Aura Cannon |
|
telegraphed wide line AoE |
| Ancient Quaga |
|
roomwide AoE |
| Meteor Impact |
|
delayed proximity AoE |
| Subduction (orb adds) |
|
instant pointblank AoE; inflicts heavy (30s) and knockback |
Notes:
-
Rotation before 85%:
- Burning Rave
- Knuckle Press
- Aura Cannon
-
Rotation after 85%:
- Ancient Quaga
- Meteor Impact - drops proximity marker under Onra; several black orbs also spawn around the room and pulse pointblank AoEs that inflict heavy
- Aura Cannon
- Burning Rave - meteor drops on proximity marker, and black orbs disappear roughly when this cast starts
- Knuckle Press
-
Melee uptime strategy:
-
Place 3 markers along the wall, using the posts for reference:
- A by the post at 3:00
- B 2 posts north/counter-clockwise from A
- C 3 posts north/counter-clockwise from B (just right of the exit)
- Do whatever for the first 15% - doesn't really matter.
- Before Onra hits 85%, position him so that he's standing on the A marker and facing south
- When he starts casting Ancient Quaga, go behind him. This prevents an auto-attack immediately after Ancient Quaga
- Wait for Onra to turn around and make one auto-attack. This is important for positioning Meteor Impact
- Immediately run just past B. You need to move right after the auto to avoid a black orb AoE. You want Onra to stop on the B marker
- Wait for one auto-attack, then run to C, which will get you out of Aura Cannon
- Wait for Burning Rave, then move to B
- Wait for Knuckle Press, then move Onra back to A facing south
- Repeat from Ancient Quaga
-
Place 3 markers along the wall, using the posts for reference:
- The delay from the Meteor Impact cast to the meteor actually dropping is random. Rarely it can drop *very* quickly, even before Aura Cannon, and deal potentially fatal damage. Steel can help mitigate this risk for jobs that can spare it
Job Notes & Kill Times
AST
Kill times:
- 11m30s with 2 strength and 1 frailty (6.0)
BLM
Kill times:
- 7m45s with strength (6.0)
BRD
- No steel required with ranged strat
Kill times:
- 8m45s with 7m of strength (6.55)
DNC
Kill times:
- 8m45s with 1 strength (6.0)
DRG
Kill times:
- 7m with strength and 1 frailty (6.0)
DRK
Kill times:
- 10m30s with 1 strength (6.28)
- 9m45s with 2 strength (6.0)
GNB
Kill times:
- 10m15s with 1 strength (6.0)
MCH
- Steel required
- Use melee uptime strategy
Kill times:
- 7m with strength (6.4)
NIN
- Use melee uptime strategy
- Steel is not required
Kill times:
- 6m30s with strength, 1 frailty and 1 gemdraught of dexterity (7.21)
PLD
- Use melee uptime strategy
- Steel is not required
Kill times:
- 10m45s with 2 strength and 1 frailty (6.0)
- 7m30s with 1 strength and 2 frailty (6.31)
RPR
Kill times:
- 5m45s with strength and 2 frailty (6.0)
SAM
Kill times:
- 6m45s with strength and 1 frailty (6.0)
SGE
- Use melee uptime strategy
- Steel is not required
Kill times:
- 12m45s with no offensive pomanders (6.0)
- 10m with 1 strength (7.15)
WAR
- Use melee uptime strategy
- Steel is not required
- Inner Strength works to nullify both the heavy and knockback from Subduction (orbs)
Kill times:
- 8m15s with strength and 2 frailty (6.28)
- 13m with no offensive poms (7.05)
WHM
- Use melee uptime strategy
- Steel is not required
Kill times:
- 12m30s with no offensive pomanders (7.16)